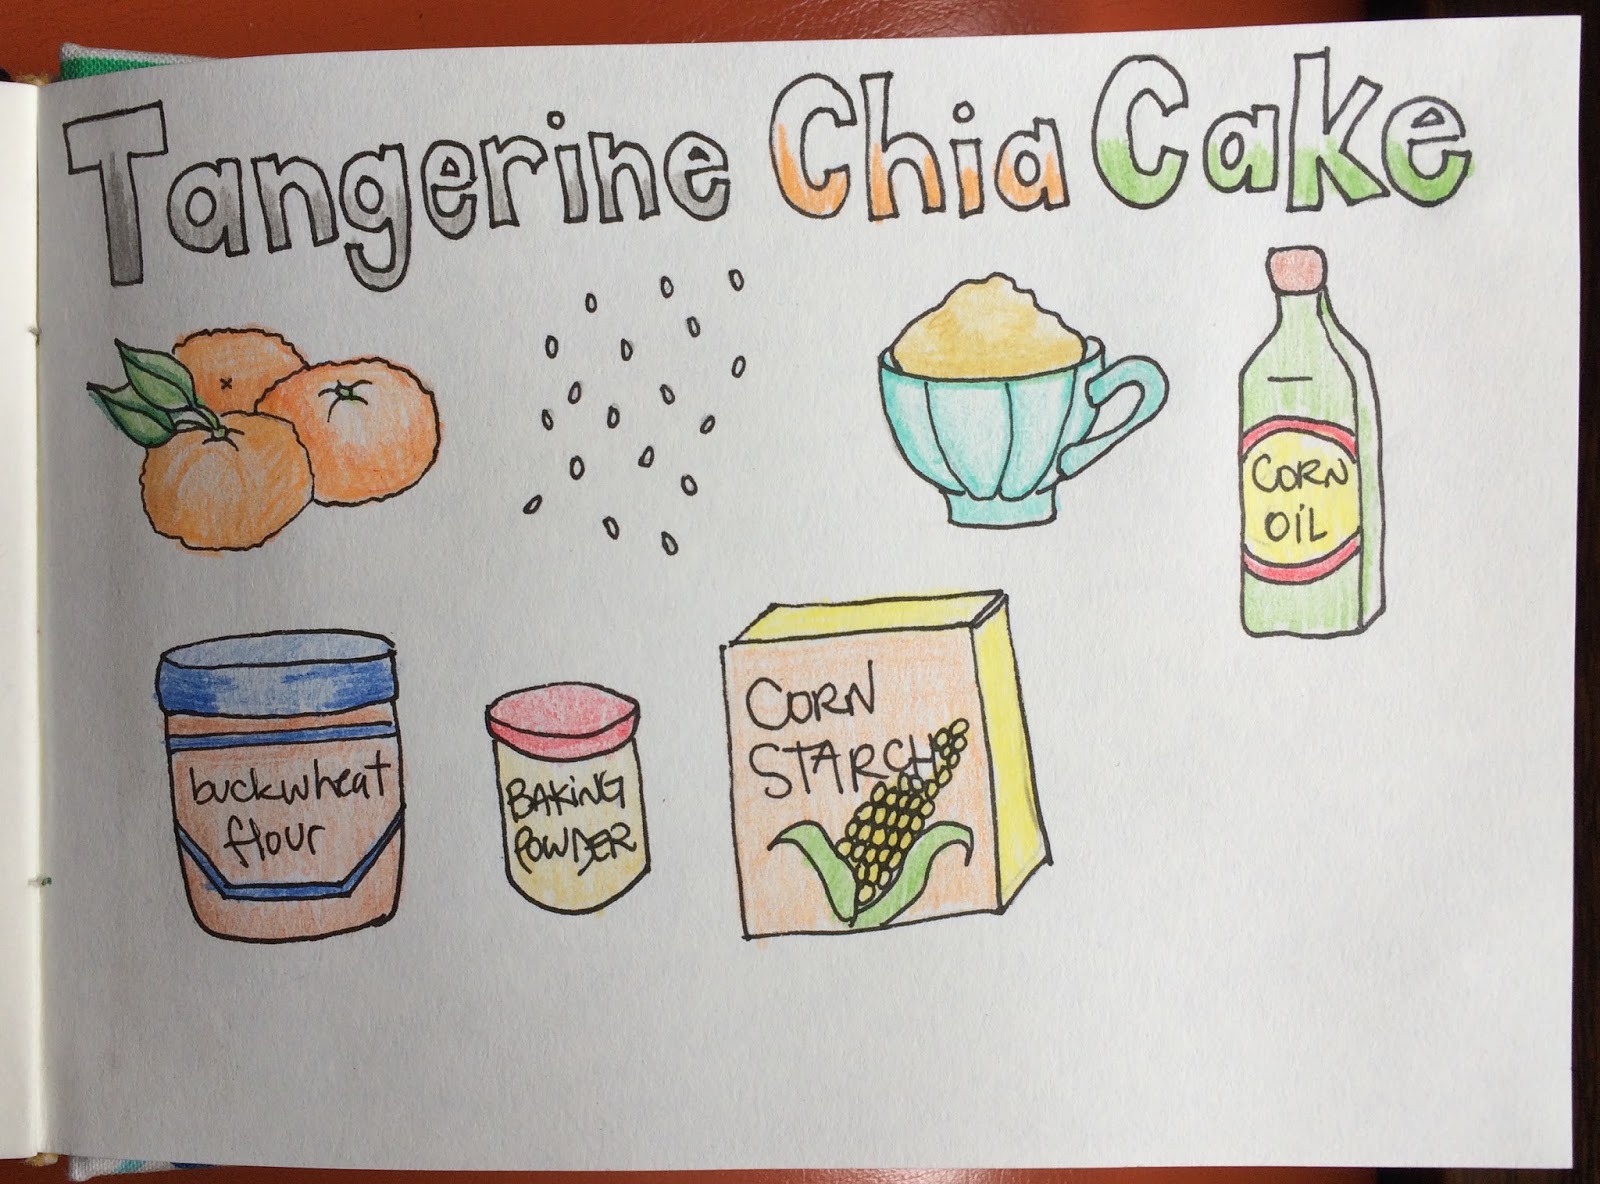
El invierno trajo las mandarinas y me da ganas de hacer todo con ellas!!! Aca les traigo la receta de un budin muy facil y rapido de hacer sanito y delicioso. Yo pongo aca la version vegana pero siquieren hacerla con huevo en vez de chia funciona igual. Se necesita batidora o minipimer. Recomiendo elegir mandarina de cascara bien finita. Es una gran excusa para invitar a los amigas a tomar el te y combatir la bajon de los dias frios!
Ingredientes
-
2 1/2 ó 3 mandarinas
- 2 cdas de semillas de chia
- 130 gr de almidon de maiz
- 120 gr de harina de sarraceno
- 1 cdta de polvo para hornear sin gluten
- 200 gr de azucar mascabo
- 100 cl de aceite de maiz
Instrucciones
Lavar bien las mandarinas, en lo posible usar organicas pero si no consiguen, dejar las mandarinas en remojo con un chorro de vinagre de alcohol y luego enjuagar. Si tienen un cepillito tambien pueden darle una cepillada. Exprimir media mandarina y mezclar las 2 cdas de chia con 6 ó 7 cdas de jugo. Dejar actuar, se va a formar como un gel. En un bowl mezclar con batidor de varillas el almidon de maiz, el polvo de hornear y la harina de trigo sarraceno para que quede bien homogeneo. Precalentar el horno a 180ºC. Abrir por la mitad 2 mandarinas sin pelar y quitar las semillas. Poner en el vaso de la licuadora (o en un bol amplio si lo hacen con minipimer) las 2 mandarinas, el aceite, el huevo de chia y el azucar. Pulsar hasta lograr una mezcla homogenea, si es necesario entre licuada y licuada bajar con una espatula lo que va quedando en los bordes. Agregar de a poco la mezcla de harina, haciendo el mismo trabajito de ir bajando los costados para que se mezcle bien todo. Aceitar y enharinar un molde de budin. Una vez que esta todo bien bien homogeneo volcamos en el molde y horneamos alrededor de 35 minutos o cuando este doradito y al pinchar con un palito de brochet salga con migas y no masa. Recomiendo comerlo en el momento o trozarlo y freezarlo. La pasteleria vegana y sin gluten tiende a cambiar bastante rapido su textura por lo que es recomendable freezar lo que no se consume el primer dia y descongelarlo cuando se quiera. Si gustan con el jugo de la media mandarina restante y azucar impalpable apta pueden hacer un glaseado. Que lo disfruten!!

Winter brought the tangerines and I feel like eating them in any way possible!!!I bring here a Pound Cake recipe, super easy and fast to do, healthy and delicious on top. The version here is vegan but if you are not vegan and you can usa an egg instead of the chia mix. I recommend using the thin skinned tangerines and organic ones if you find them. It is great excuse to invite your friends over for tea and fight the winter blues!
Ingredients
-
2 1/2 or 3 tangerines
- 2 Tbsp chia seeds
- 130 gr corn starch
- 120 gr buckwheat flour
- 1 tsp gluten free baking powder
- 200 gr mascabo sugar
- 100 cl corn oil
Instructions
Wash thoroughly the tangerines with the skin, if they are not organic immerse them in water with a dash of white vinegar let them rest there for a few minutes and rinse. Squeeze half tangerine and mix 6/7 Tbsp with the 2 Tbsp of chia seeds. Mix well and let rest to form the gel. In a bowl mix the corn starch, the baking powder and the buckwheat powder with a whisker. Preheat the oven to 180ºC. Cut the remaining tangerines in halves and take the seeds away. Put them in the glass of the blender or in a bowl if you use a hand-mixer. Add the oil, the chia mix and the sugar. Blend until smooth, if necessary use a spatula to bring down the dough climbing the sides. Slowly add the flour mix repeating the spatula process if needed. Oil and flour a pound cake tin. When the mix is totally even, put the dough in the tin and bake for around 36 minutes, or until golden and pinching with a brochette stick, it comes out clear I recommen either have it immediatly -yumm- or freeze it even a bit warm. Vegan gluten free bakery can change a lot the texture in the first 24 hours so even if you plan to eat the cake just a couple of days later it is better to freeze it in the meantime. I hope you enjoy it!!!
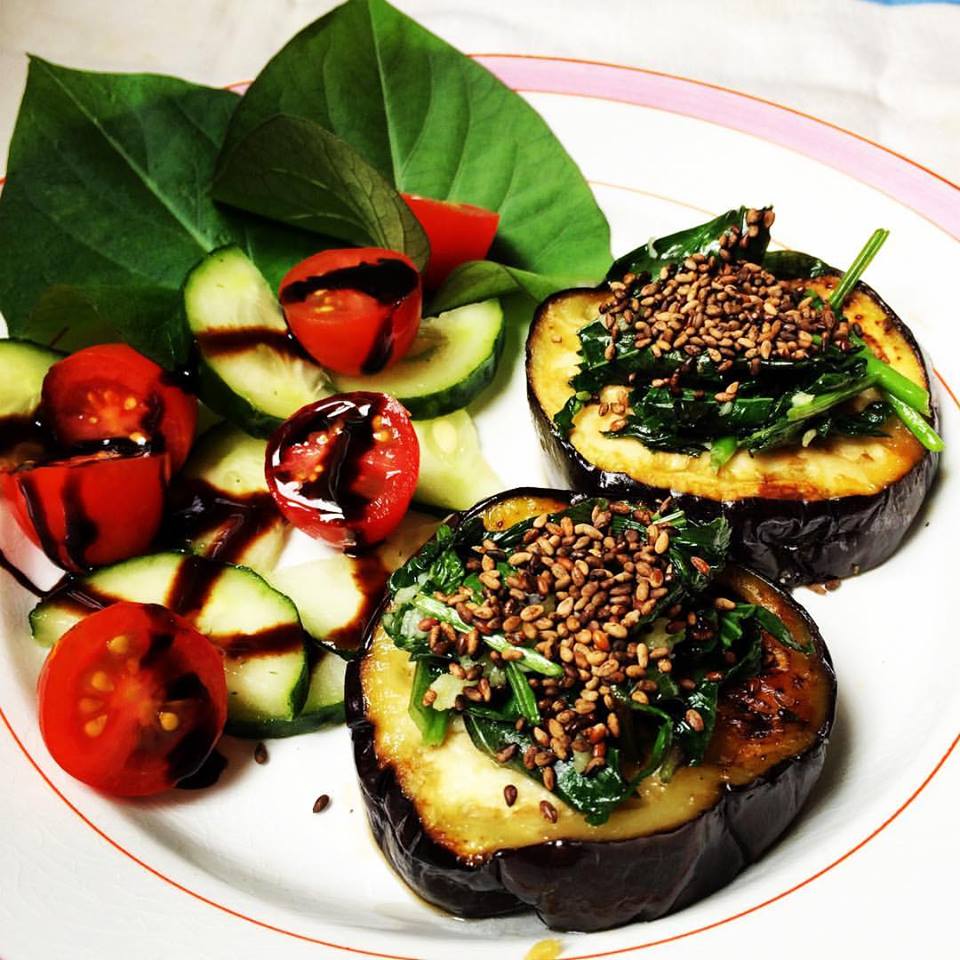
Hace un tiempo un amigo me conto que en Vietnam comen las hojas de la batata. En esa época yo habia empezado a plantar todas las batatas que se brotaban pero todavia no me animaba a comerlas...porque? Ni idea. Las plantas de batatas son muy faciles de criar y muy decorativas. Crecen de gajo muy facilmente y no tienen exigencias. Asi que ahora teniendo una plantas hermosas me tenté y son riquisimas!!! Asi que esta receta es solo una excusa para mostrarles que facil y que rico es comer hojas de batata. La idea de los bocaditos de berenjena me la inspiro un plato que comi en lo de un cocinero japones una vez y tambien se puede versionar con el topping que gusten. En el plato puse un par de hojas enteras para que vean que lindas que son. A ver si se animan!
Ingredientes
-1 berenjena
-1 atado/ramo de hojas de batata
-1 diente de ajo
- sesamo
- aceite de girasol
para acompañar
- 1 puñado de tomates cherry
- 1 pepino chico
- aceto balsamico cremoso
- aceite de oliva
Instrucciones
Empezamos tostando apenitas un puñado de sesamo en la sarten caliente, sin ninguna materia grasa. Apenas un par de segundos para que no se queme, retirar de la sarten y reservar en un bowl aparte. Lavar y cortar en tiras anchas las hojas de batata y los cabitos. Picar el ajo. Cortar la berenjenas en rodajas gruesas, como de 1,5cm / 2cm. Calentar un poco de aceite en la misma sarten y dorar las hojas y el ajo por un par de minutos y reservar tambien aparte. Agregar un poco de aceite si es necesario, y cocinar las berenjenas. Dejar que se doren un poco de cada lado. Yo tapo la sarten un poco de minutos. Una vez que esten tiernas pero que no se desarmen. Servir 2 ó 3 rodajas de berenjena en cada plato. Arriba de cada rodaja poner un poco de hojas de batata con ajo y arriba el sesamo tostado. Para acompañar cortar los cherrys en mitades, el pepino en rodajas y condimentar con el aceto y oliva. Voila! Se van a sorprender!!!

Some time ago a friend of mine told me they eat the sweet potato greens in Vietnam. I was starting to grow sweet potato plants from every sweetpotato that would sprout but still had not dare to try them as food. Sweet potato are a very easygoing plant to grow and very decorative. They do not like cold but otherwise can adapt to grow indoors and have no big demands. I have some wonderful plants these days and finally got tempted. And you know what? They are delicious! So this recipe is actually an excuse to show how easy is to eat sweet potato greens. The eggplant base was inspired by dish a Japanese chef cooked a while ago. You can top it with any other thing you like also. I left a couple of whole leafs on the dish so you could see how nice they look.
I hope you dare to try!
Ingredients
-1 eggplant
-1 bunch of sweet potato greens
-1 garlic clove
- sesame
- sunflower seed oil
as a side
- 1 handful of cherry tomato
- 1 small cucumber
- creamy balsamic
- olive oil
Instructions
We start by roasting the sesame seeds in a clean pan. Just a few second not to burn them and without any fat. Set aside the seeds and the pan, we will use it later. Wash and cut the sweet potato greens and chop the garlic. Cut the eggplant in 1,5cm/ 2cm slices. Heat some oil in the same pan you used, and cook the greens and garlic until slightly soft it only takes some minutes. Set them aside and lay the eggplants slices and let them cook until golden in both sides, tender but not too soft. Put 2 ó 3 eggplant slices in each dish. Top it with the sweet potato greens and garlic, and finish with the roasted sesame seeds. Cut the cherry tomatoes, cucumber and dress with olive oil and creamy balsamic. Voila! You will be surprised!!
Esta semana tome un poco de frio en un concierto al aire libre. Cada vez que creo que me voy a enfermar uso la vieja receta de la abuela. Si, sopa! Me hago una rica y nutritiva sopa y 99.9% de las veces se me pasa. Viendo que tenia en la heladera me tope con una plantita de pak choi. Para los que no saben, el Pak choi o Bok choi es una especie de acelga oriental con un sabor muy delicado, muy rico en vitaminas, especialmente C y minerales como el calcio. Para complementarlo elegí unos shiitake secos que me habian regalado pero seguro queda super rico si consiguen hongos frescos (tambien pueden ser champignones). El toque oriental es realzado por unas gotitas de aceite de sesamo y el toque americano se lo di con un puñadito de amaranto. Espero que lo disfruten tanto como yo!!
Ingredientes
- 1 planta de pak choi
- 6 hongos shiitake secos o frescos
- 1 cebolla grande
- 1 diente de ajo
- 1 cdta de sal marina
- 1/2 pocillo de cafe de amaranto
- medio limon
- aceite de girasol
- aceite de sesamo
- 1 puñado de sesamo integral tostado
- 1 lt de agua
Instrucciones
Poner a hidratar los hongos en agua tibia, si usan frescos este paso no es necesario. Cortar la cebolla por la mitad y luego en rodajas no muy finas, picar el ajo. Lavar y cortar el pak choi en tiras de 1 ó 2 cm de ancho. Poner a calentar en una ollita un chorrito de aceite de girasol o cualquier aceite neutro. Agregar la cebolla y el ajo dorar un poco y agregar el pak choi, dorar un tambien un poco y agregar el agua. Agregar la sal. Tomar el agua de los hongos hidratados y echar tambien en la olla. Cortar los hongos en rodajas, sumar a la sopa. Agregar el puñado de amaranto y dejar cocinar por 10/15' mas. Yo puse solo un puñado, algo asi como medio pocillo de cafe porque no queria que sea tan pesada si quieren pueden poner mas y quizas un poco mas y quedara mas espesa. Una vez pasados los 15 minutos agregar unas gotitas de aceite de sesamo. Servir con un poquito de jugo de limon, espolvoreando con sesamo tostado y una rodajita de limon. MMmmhmm!

This week I got a bit cold attending an open air concert. Every time I think I am going to get a cold I use the old grandma recipe. Yes you guessed it, Soup! I prepare a delicious and nutrive soup with a heart and bodywarming magic effect and 99.9% it works! Checking the fridge I found a pak choi. For those who don't know it, Pak choi or Bok choi is an asian kind of chard, with a very delicate flavor and a lot of vitamins and minerals, vitamin C and Calcium. I decided to combine it with some dried shiitake tha I got as a present but if you find fresh ones it is even better, and I'm sure it works also super with champignons. The oriental touch is enhanced by some drops of sesame oil and the latinamerican touch with a touch of amaranth. I hope you enjoy it as much as I did!
Ingredients
- 1 pak choi
- 6 shiitake mushrooms, dried or fresh
- 1 big onion
- 1 garlic clove
- 1 tsp sea salt
- 1/2 a espresso cupamaranth
- some lemon
- sunflower oil
- sesame oil
- a handful of sesame seeds toasted
- 1 lt water
Instructions
If you are using dried mushrooms, put them in a bowl with warm water to hydrate. Slice the onion not very thin, and chop the garlic clove. Wash and cut the pak choi in stripes. Heat some oil in a pot. Put the onion and garlic and stir a bit until they are slightly golden. Add the pak choi and stir another bit until they go golden too. Put the water in the pot and add the sea salt. If you were using the dried mushrooms, add the water you use to hydrate and cut the mushrooms in slices and add to the soup. Then add the amaranth and let simmer for 15 minutes. I used only a small portion of amaranth because I wanted ths soup to be light but you can add more if you want. Turn off the fire add some drops of sesame oil and stir. Serve with a dash of lemon juice, sprinkle with toasted sesame seed and a thin slice of lemon. MMmmhmhm!!
Esta es mi primer receta con Teff y quiero decirles que estoy muy satisfecha!! El Teff, es una semilla muy chiquita similar a un cereal sin gluten originario de Etiopia. Es muy rico en proteina, fibras y minerales como el hierro. Yo habia probado algunos productos industriales con Teff como galletas y pan pero nunca puro y nunca habia preparado nada sola. Como hace un tiempo tenia antojo de pizza decidí experimentar asi. Yo hice una version vegana pero tambien funciona perfecto con la clasica salsa de tomate y queso derretido.
Hagan la version que mas les guste, la fantasia puede volar con la pizza!!!
Ingredientes
- 250 gr de harina de teff
- 1/2 cdta de goma xantana
- 1 cdta de levadura seca sin gluten
- 1/2 cdta de azucar
- 1/2 cdta de sal
- 250ml de agua tibia
- 4 cdtas de aceite
- 4 cdas de salsa de tomate casera
- toppings a gusto, queso muzzarella, hierbas frescas y aceitunas, tomate fresco y ajo, como la que hice yo: hummus, morrones asados y rucula fresca.
Instrucciones
Poner en un bol todos los ingredientes secos: harina de teff, goma xantana, azucar, sal y levadura. Mezclar bien, bien, Agregar el agua tibia, luego el aceite y mezclar animadamente con cuchara de madera hasta que se forma una masa firme. Esparcir la masa en una pizzera aceitada y dejar levar por 60'/90' . Precalentar el horno a 180ºC cubrir con los toppings y hornear por 10'/15'. Yo hice una pizza mediana y una pequeña. Para poder freezarla a la grande solo le puse salsa de tomate y la deje en el horno solo 8'/10'. Luego la saque y la deje descongelar y la cubri con hummus y tiras de morron asado. Siempre que elijamos hojas frescas, como albahaca, rucula o similar, recomendaria ponerlas al servir luego sacar la pizza del horno. Buon appetito!!!

This is my first recipe with Teff and I have to say I am super satisfied with the result. If you are not familiar with the Teff let me tell you it is a very small seed similar to cereal originally from Eritrea. It has a lot of protein, iron and fiber. I had tasted already some industrialized products with it, but never pure and had never baked with it before. As I was craving for pizza I decided it was a good opportunity to give it a try. I prepared it in a vegan version with homemade hummus, roasted pepper and fresh rocket, but works wonders also with grated cheese. Try your own version, pizza fantasy has no limits!!
Ingredients
- 250 gr teff flour
- 1/2 tsp xantan gum
- 1 tsp dry gluten free yeast
- 1/2 tsp sugar
- 1/2 tsp salt
- 250ml warm water
- 4 tsp oil
- 4 Tbsp homemade tomato sauce
-
toppings to taste, my version here is with homemade hummus, roasted pepper and fresh rocket, but you can try with cheese, and olives if you are not vegan, fresh tomatoes and garlic, fresh herbs or whatever comes to your mind
Instructions
Put in a bowl all the dry ingredients, flour, xantan gum, sugar, salt and yeast. Mix thoroughly. Add the warm water, then the oil and mix all with a wooden spoon until it becomes a thick dough. Spread on a oiled baking tray and let rise for around 60'/90'. Preheat the oven to 180ºC. It yields a big pizza but I made a medium one and a small one. I ate the small one right away and decided to freeze the medium one. So I put soem tomateo sauce and baked the one for the freezer just 8'/10'. Let it cool and froze it If you eat it right away bake for arouns10'/15'. For the hummus, pepper, rocket version I would recommend to top it with everything but the fresh leaves before baking. Then add the rocket when serving as with any nice fresh leave to avoid them to shrink. Buon appetito!!
Perdoooooooon, se que estuve ausente por muchisimo tiempo. Estuve trabajando mucho y despues aterrizando... Pero para compensarlos les traiga una receta espectacular. Supongo que habran oida hablar del Borscht. Es una sopa tipica de Europa del Este que tiene version de invierno y version de verano. En dias de frio Berlin es mi plato favorito en un pequeño restaurant ruso en Wedding y viendo las hermosas remolachas que tenian estas ultimas semanas en Buenos Aires me inspiré para hacer una version un poco libre para servir en una cena con amigos. Estaba un poco nerviosa porque entre mis invitados contaba con un chef profesional y 2 vocacionales muy talentosos. Pero finalmente fue un exito. Da un poco mas de trabajo que mis recetas habituales pero se puede preparar con anticipacion y armar el plata en el momento.
Ingredientes (para 6 porciones)
- 4-6 remolachas dependiendo del tamaño
- 2 tazas de jugo de coccion de las remolachas
- 1 1/2 tz de caldo *
- jugo de medio limon
- 2 cdas de vinagre de arroz
- 1 cdta de miel o azucar morena
- 150cc de yogur natural sin endulzar
- sal
- pimienta
- 1 pepino pequeño o 1/2 gde
- 5 rabanitos
- 6 cdas de queso blanco
- wasabi a gusto
*usar caldo sin gluten o hervir unos trocitos de verdura como una zanahoria una rama de apio y una cebolla con un poco de sal y especias si gustan, por un rato y voila, caldo de verduras casero!
Instrucciones
Lavar las remolachas a conciencia, yo las cepillo en general para sacar bien toda la tierra. Poner en una olla cubrir apenas con agua y hervir hasta que esten tiernas. Dejar enfriar. Retirar las remolachas. Colar el jugo de coccion y separar 2 tazas en un bowl amplio. Agregar el caldo frio, el jugo de limon, el vinagre, la miel, la sal y pimienta y mezclar bien. Pelar y cortar las remolachas en trozos asi nomas y agregar al bol. Procesar con minipimer y sumar el yogur. Procesar todo hasta que quede homogeneo. Refrigerar al menos un par de horas antes de servir. A la hora de servir, cortar los pepinos y los rabanitos en cubitos pequeños, de medio centimetro de lado. Mezclar el queso blanco con la cantidad de wasabi que gusten. Servir bien frio, poniendo 2 cucharadas de cubitos de pepino y rabanito y una de queso crema en cada porcion. Un plato muy refrescante y sano para lucirse las noches de verano, mis invitados estaban muy felices !!!

I am so sorry I've been away for so long. I had loads of work and then changin continents. But to make it up for you I bring a wonderful recipe. I guess you heard about Borscht already. It is a fantastic east european traditional recipe with a lot of different versions. In the cold days in Berlin it is my favourite dish at a small russian restaurant in Wedding. In the last days the red beets were so nice here in Buenos Aires I got inspired. I was a bit nervous because I prepared it for the first time for a dinner with friends, and i had as guests 1 professional chef and 2 amateur ones but really good ones. But finally it was a huge success. It needs a bit more work than my ususal recipes but it is totally worth it and it can be prepared in advance, even the day before and set together afterwards.
Ingredients (shields 6 )
- 4-6 red beets
- 2 cups from the red beets cooking liquid
- 1 1/2 cups vegetable broth*
- juice of 1/2 lemon
- 2 Tbsp rice vinegar
- 1 tsp honey or brown sugar
- 150cc natural unsweetened yogurt
- salt
- pepper
- 1 small cucumber or half a big one
- 5 radishes
- 6 Tbsp cream cheese
- wasabi to taste
* the broth should be gluten free, if you want to make a home made one just boils some carrot, celery and onion with a dash of salt and some sipces if you like. Voila! Homemade broth!
Instructiones
Wash the beets thouroghly, I brush them to take all the earth out. Boil them covered in water until they are tender. Let cool. Set the beets aside and strain the liquid where the beets where boiled. Measure 2 cups into a bowl. Add the broth, lemon, juice, vinegar, honey or sugar, salt and pepper and stir. Peel and ccut in big pieces de beets, add in the bowl and mix with a hand mixer, add the yogurt and mix again until the soup has a smooth texture. Put in the fridge for at least 2 hours before eating it. To serve it, cut the radishes and cucmber in small cubes of half a centimeter side. Mix the cream cheese with wasabi to taste. Serve a portion of the soup, add 2 tablespoons pf the radish-cucumber cubes and add one tablespoon of the wasabi cream cheese. It is a super refreshing summer dish and my guests were very impressed. I hope you love it too!!