Mostrando entradas con la etiqueta galletitas/cookies. Mostrar todas las entradas

miércoles, 16 de noviembre de 2016

Lemon Sorghum Cookies. Galletitas de sorgo y limon


Hace un tiempo compré harina de sorgo por curiosidad. El Sorgo un cereal originario de Africa que  historicamente se usado para alimentar animales pero en los ultimos tiempos se popularizo entre los humanos ya que tiene un gran valor nutricional. Estuve un tiempo pensando que hacer y finalmente me animé. Como no le tenía mucha la onda decidi hacer como primer prueba unas galletitas que son medio infalibles. Esta vez no llegue a probar la versión vegana asi que sale la solo gluten free y en algún momento cuando pueda probaré la vegan. Recomiendo hacerlas bien chiquitas para que se quiebren menos y es una medida genial para comer con el cafe. Yo usé una tapita de una botella de 3 cm de diametro. Si tienen ganas les pueden hacer carita, con esta receta la galletita conserva su forma!!

Ingredientes
- 250 gr de harina de sorgo
- 100 gr de azucar
- 150 gr de manteca blanda
- 1 huevo
- 1 cdta de polvo para hornear
- ralladura de cascara de limon 

Instrucciones
Mezclar el polvo de hornear con la harina y luego todos los otros ingredientes hasta tener una masa homogenea. Envolver en film y dejar reposar media o una hora en la heladera. Precalentar horno a 180º. Retirar y estirar con palote hasta un espesor de medio cm, yo cubro la masa con un film para trabajar mas facil. Cortar las galletitas  Hornear por 18'-20' sin distraerse hasta que esten suavemente doradas. Buen provecho!!

Some while ago I bought Sorghum flour out of curiosity. Sorghum is a cereal originally from Africa, but nowadays is grown almost all aorund the globe. Historically was used to feed animals but lately due to it's high nutritional levels. I was thinking for some time what could I do with it and finally I dared. As I was not sure how it would behave I decided to do these cookies as a frist try as they are kind of unbeatable. I couldn't make it vegan, so it comes as Gluten free only, but I promise to try a vegan version soon. I recommend to cut the small, I used the a bottle cap, with a 3 cm diameter. They keep the shape so you can draw a smily face on them!!

Ingredients
- 250 gr sorghum flour
- 100 gr sugar
- 150 gr soft butter
- 1 egg
- 1 tsp baking powder
- zest of one lemon

Instructions
Mix the baking powder with the flower and then all the other ingredients until you get an even dough. cover with film and let it rest in the fridge for about half or one hour. Preheat the oven into 180º. Take the dough out of the fridge and roll it with a rolling pin. I cover it with a film to make it easier. Cut the cookies and bake them for about 18'/20' without going to far away until they are golden. Bon apetit!
 

lunes, 27 de junio de 2016

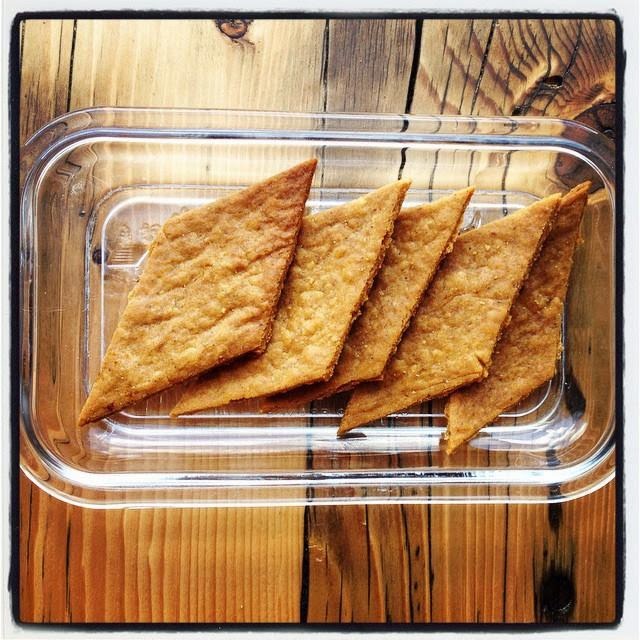
Galletitas de sesamo. Sesame crackers

Antes de viajar trato de prepararme algun power snack en caso de que la aerolinea se olvide mi dieta especial. En este caso tenia un monton de sesamo que habia comprado al por mayor y no llegue a consumir y decidi usarlo. Hice estas crackers que se hacen muy rapido y son una gran fuente de energia y felicidad. Se dejan comer solas o combinan maravillosamente con palta, dulce casero, queso blanco o lo que mas les guste.

Ingredientes
- 2 tazas de sesamo integral crudo (yo lo tenia en la heladera si lo hacen en verano recomiendo hacerlo)
- 1 cda de chia molida
- 2 cdas de aceite de coco derretido
- 1 pocillo de cafe de agua (a modificar segun necesario)
- 1 pizca de sal

Instrucciones 
Precalentar el horno a 170ºC.  Poner sesamo en la procesadora y pulsar hasta que se haga una arena mas o menos fina. Volcar en un bol, agregar la chia y y la sal y mezclar bien, es importante mezclar despues de la chia para que no se hagan grumos. Agregar el aceite de coco y la mitad del agua y mezclar energicamente tratando de formar una masa quebradiza pero homogenea, ir sumando mas agua hasta lograr que al aplastar la masa se vea lisa (con las irregularidades del sesamo claro). Si tienen una procesadora con un vaso grande pueden ir poniendo los ingredientes directo ahi y sacar una porcion con una cucharita para probar que este bien unida. Forrar una placa con papel de hornear o una plancha de silicona. Poner una porcion de masa y cubrir con film o papel para estirar hasta que quede de 4 mm de espesor masomenos. Marcar cuadrados o la forma que mas les guste y poner en el horno por 12' sin alejarse mucho que se queman rapido. Dejar enfriar del todo antes de comer para que esten crocantes y a disfrutar!!!

Before traveling I try to prepare myself some power snack just in case the airline forgets my special meal. This time I had an interesting amount of sesame and decided use them for this purpose. I baked these crackers, with very few ingredients and time required and they are a great source of energy and happiness too! You can enjoy them alone or with avocado, jam or cream cheese. 

Ingredients:
- 2 cups raw whole grain sesame (I had them in the fridge it you live in a hot weather aere  I recommend to do so)
- 1 Tbsp milled chia seeds
- 2 Tbsp melted coconut oil
- 1 espresso cup water (adjust as needed)
- 1 pinch salt 
Instructions 
Preheat oven to 170ºC. Put the sesame in the food processor and pulse until it becomes like wet sand. If you have enough space you can add the ingredients in the recipient, as mine is small I laid the sesame sand in a bowl. The order of the adding of the ingredients is important. First put the chia and salt and mix thoroughly, the add the oil and mix again, and last add the water first half of the cup, mix and keep adding checking the texture. The dough has to be a bit crumbly but able to look somehow smooth by pressing it. Lay parchment on a baking tin, put some of the dough and cover with more parchment or a film and roll it until it is around 4mm thick. take the film or top parchment out and mark with a pizza cutter or a knife squares or the shape you would like. Bake for around 12 minutes  or until slightly golden without going too far as they are very easy to burn. Let cool completely before eating to allow them to be really crunchy. Hope you enjoy them!!

sábado, 3 de enero de 2015

Otra vez tarde pero seguro, les traigo esta deliciosas galletas, muy tradicionales en los paises frios. En algunos lugares se usan para decorar el arbol. Lamentablemente no tenia moldecitos para cortar hombres asi que decidi hacer caritas....
Ingredientes
- 100 gr harina de arroz
- 100 gr  harina de garbanzo
- 100 gr harina de trigo sarraceno
- 1 cdta de goma xantica
- 1 cdta de bicarbonato de sodio
- 1 cdta de polvo para hornear sin gluten
- 2 ó 3 cdtas de jengibre fresco rallado
- 1 cda de canela
- 3 cdas de miel
- 175 gr de azucar negra
- 100 gr de manteca blanda
- 2 huevos

Instrucciones
Mezclar en un bol las 3 harinas, la goma xantica, bicarbonato, polvo de hornear, jengibre y canela. Aparte mezclar el azucar negra, con la manteca y la miel e incorporar los huevos hasta que que quede una mezcla homogenea. Unir las 2 mezclas, queda una masa lisa quizas un poco quebradiza. Hacer un bollo y envolverlo en film. Dejar reposar en heladera 1 hr. Precalentar el horno a 160ºC. Estirar con palo sobre superficie enharinada (yo use harina de arroz) y cortar de la forma que gusten, hombrecitos, arboles de navidad, circulitos, etc...Hornear 12/15 minutos o hasta que esten suavemente doradas. retirar y dejar enfriar en una rejilla 10/15 minutos. Si las quieren decorar, hacer un glace con azucar impalpable agregando agua o jugo de limon de a gotitas hasta lograr un glace firme para que no pierda la forma al decorar. Poner en una manga o una bolsita limpia, cortar la punta y decorar. A disfrutar y que tengan un hermoso 2015!!


Again late, I bring these wonderful gingerbread cookies. Unfortunately I didn't have any man shaped cookie cutter so I decided to do some smileys. 
Ingredients
- 100 gr rice flour
- 100 gr  gram flour
- 100 gr buckwheat flour
- 1 tsp xantham gum
- 1 tsp baking soda
- 1tsp GF baking powder
- 2 / 3 tsp freshly grated ginger
- 1 Tbsp cinnamon
- 3 Tbsp honey
- 175gr brown sugar
- 100 gr soft butter
- 2 eggs

Instructions
Mix the three flours, xantham gum, baking soda, baking powder, ginger and cinammon in a bowl. In a different bowl. Mix the brown sugar with the sogt butter and the honey, add the eggs until the mix is even. Combine both mixtures into a dough. Shape it into a ball, cover with a plastic film and let rest in the fridge for one hour. Preheat the oven into 160ºC. Flour a surface and roll the dough with a pin. Cut the cookies in the shape you prefer, christmas tree, men, hearts, etc... Bake for about 12/15 or until lightly golden. Let cool for about 10/15 and decorate with glaze. To prepare the glaze, use some icing sugar and add drops of water or lemon juice until it becomes a firm glaze. Decorate to taste and enjoy. Have a wonderful 2015!!!!

lunes, 29 de septiembre de 2014

Peanut Crackers. Crackers de mani.


Estas galletitas las prepare para enfrentar un viaje de 30 horas en 3 aviones. Y me salvaron la vida porque la aerolinea extravio mi pedido de comida sin gluten. Son un snack muy sabroso y nutritivo. El mani, a pesar de gozar de mala fama tiene muchas proteinas y fibra, minerales como el zinc, potasio y manganeso y un monton de vitaminas entre ellas la B3, tambien conocida como niacina. Asi que dicho esto, aqui la receta.

Ingredientes
- 1 1/2 taza de mani tostado
- 1 taza de harina de maiz.
- 3 cdas de vinagre de arroz
- 1 chorrito de salsa de soja sin gluten 
- 1/2 vaso de agua

Instrucciones
Poner en la procesadora el mani (si el vaso es chico hacerlo en partes) e ir pulsando con paciencia primero hasta que se forme como una harina y luego una crema. Despues de cada pulsacion despegar lo que se va pegando a los bordes. Si es necesario agregar 1 o 2 cucharadas de aceite de mani o neutro tipo girasol.  Una vez lograda la crema o manteca de mani deberia ser masomenos una taza en total. Precalentar el horno a 180º y forran una placa con papel de horno o una plancha de silicona para horno. Si tienen lugar en el vaso de la procesadora ir agregando los ingredientes pulsando hasta obtener una mezcla pareja. Si no volcar en un bol, e ir agregando los ingredientes y mezclando cuidadosamente para que todos los ingredientes se integren bien y quede una pasta cremosa. Esparcir sobre la placa una capa pareja de 3mm de espesor. Para estirar bien se puedo poner un film y amasar por arriba. Cortar en rectangulos o la forma que gusten. Hornear 15 minutos, dar vuelta y hornear otros 15 minutos del otro lado. Buen provecho!!


I baked these crackers to face a 30 hours trips taking 3 flights. And they saved my life because the airline forgot my special Gluten Free food request. They are a delicious and very nutritive snack. Peanuts may have a bad reputations but actually they have lots of protein, fiber, minerals such as zinc, potassium and manganese and a load of vitamins. So I rest my case and below the recipe.

Ingredients
- 1 cup unsalted and unsweetened peanut butter OR 1 1/2 cup toasted peanuts to make the butter
- 1 cup cornflour.
- 3 Tbsp rice vinegar
- 1 shot Gluten Free soy sauce
- 1/2 glass water

Instructions
If you have ready made peanut butter just jump to the next paragraph. To make your homemade peanut butter, put the peanuts in a food processor. If the container is not big enough to comfortably process all the peanuts, do it in parts. Pulse the processor until it turns into a rough sand, scrap the walls and pulse again scraping from time to time the walls until you get the cream, if necessary you can add 1 or 2 Tbs peanut oil or some neutral oil.
Preheat the oven into 180ºC and line a baking sheet with parchment. Then add all the other ingredients in the processor container or if it is small put each ingredient in a bowl and mix thoroughly until it turns into a creamy paste. Spread the paste on the parchment, if necessary cover with another piece of parchment and roll until it is around 3mm thick. Cut in rectangles or the shape you like. Bake 15 minutes on one side, turn and bake 15 minutes on the other side. Enjoy!!


martes, 16 de septiembre de 2014

Bocaditos de coco. Coconut Bites.

Ingredientes
- 100gr de harina de maiz 
- 1 taza de amaranto inflado *
- 100gr de coco rallado
- 60 gramos de manteca o margarina si quieren hacerlo vegano
- jugo de 1 lima
- 2 cdtas de polvo de hornear
- 2 cdtas de extracto de vainilla a gusto
- 4 cdas generosas de pure de manzana
- 50 gr de azucar (asi son suavemente dulces, pero a gusto pueden usar mas)

Instrucciones
Precalentar el horno a 180º y forrar una bandeja con papel de horno o enmantecar y enharinar. Mezclar bien todos los ingredientes secos en un bol y los ingredientes humedos en otro hasta obtener una mezcla homogenea. Luego combinar las 2 partes y mezclar bien. Poner porciones con una cucharita aplastando un poquito arriba. Hornear por 10-15 minutos o hasta que esten doraditos. Dejar enfriar bien y guardar en recipiente hermetico. A disfrutar!
* para hacer el amaranto inflado se pone el amaranto en una sarten con tapa cubriendo apenas la superficie del fondo sin usar nada de aceite o materia grasa. Se calienta la sarten y en muy poco tiempo se explotan los granitos, es muy rapido asi que hay que estar atento a que no se queme.


Ingredients
- 100gr corn flour
- 1 popped amaranth *
- 100gr shredded coconut
- 60 gr butter or margarine
- juice of 1 lime
- 2 tsp lime juice
- 2 tsp vanilla extract
- 4 generous Tbsp apple sauce
- 50 gr de sugar (they are softly sweet, to taste feel free to use more)

Instructions
Preheat oven to 180ºC and line a baking tin with parchment. Mix all the dry ingredients in one bowl and all the wet ingredients in another one. Then combine both parts and mix thoroughly. Lay portions with a teaspoon and flatten a bit the top. Bake for 10/15 minutes or until golden. Let cool completely and store in an air tight container. Enjoy!
* to pop the amaranth put a very thin layer of amaranth in a pan without any oil or fat. Heat until it pops, it goes very fast so be careful not to burn them.
.

miércoles, 9 de julio de 2014

Cantuccini.

Los Cantuccini, tambien llamados biscotti, son unos bizcochitos tipicos italianos que se hornean 2 veces. Por esta razon quedan crocantes y sequitos y duran mas. Me encantan con rico cafe!

Ingredientes
- 300gr premezcla sin gluten o 100 gr fecula de mandioca, 100 gr almidon de maiz, 100 gr harina de arroz.
- 180 gr de azucar
- 200 gr de almendras
- 3 huevos
- 1 cdta de polvo de hornear 
- 1 pizca de salt
- 1/2 cdta de extracto de vainilla (si no consiguen pueden usar esecia)
- ralladura de un limon.

Instrucciones
Precalentar el horno a 180ºC. Forrar una plancha para horno o enmantecar y enharinar bien. Mezclar bien los ingredientes secos (harina, azucar, polvo de hornear, sal y la piel de limon tambien) en un bol. Agregar las almendras y mezclar. En otro bowl batir los huevos con la vainilla y luego agregar a los ingredientes secos. Unir todo bien hasta conseguir una bola de masa.

Enharinar(con algo de lo utilizado para la mezcla) una superficie y amasar con las manos hasta formar 3 rollos aplastando los extremos para que nos de una galletita en la punta tambien. Poner en la bandeja dejando una separacion entre los rollos ya que pueden expandirse para los costados. Hornear por 30' aprox o hasta que la masa este ligeramente dorada. Retirar del horno y bajar la temperatura a 150º. Dejar enfriar por 5-10 minutos y cortar rodajas de 1,5 cm de ancho y ubicarlas de nuevo en la bandeja que usamos antes apoyadas de lado. Hornear 10, dar vuelta y hornear 8-10 minutos del otro lado hasta que esten bien sequitas. Retirar del horno y dejar enfriar bien. Guardar en envase hermetico. Bon apetit!


Cantuccini, also known as Biscotti are a typical italian biscuit, double baked. For this reason they are crunchy and dry and they last longer. I love them with a nice coffee!

Ingredients
- 300 g GF flour or 100 gr tapioca starch, 100 gr cornstarch, 100 gr fine cornflour.

- 180 g sugar

- 200 g almonds

- 3 eggs

- 1 tsp baking powder

- a pinch of salt

- 2 tsp natural vanilla extract

- grated peel of one lemon 

Instructions
Preheat oven to 180ºC. Line a baking sheet with parchment or grease and flour. Mix in a bowl all dry ingredients, flour, sugar, baking powder, salt and lemon peel. Add almonds and mix again. In another bowl beat the eggs with the vanilla. Add to the dry ingredients and mix until you can make a ball with it. Flour lightly a surface and make 3 rolls out of the dough. Flatten a bit the ends. Lay the rolls on the baking sheets and bake for 30' or until softly golden. Remove from oven. Lower the temperature to 150ºC. Let cool for about 5-10' and cut in 1,5cm thick slices and place on the side again on the baking sheet. Bake again for about 10', turn to the other side and bake 10' more or until they are dry. Remove and let cool. Use an airtight container for storage. Bon apetit!