Estos panqueques son un clasico de la comida vegana, no me voy a atribuir la autoria porque es imposible saber quien la hizo primero. Pero como todo buen clasico vale la pena probarlo, aqui yo les puse una semillas tostadas para darle un toque aromatico y al relleno le agregue un toque de vino.
Ingredientes
para los panqueques:
- 1/2 taza de harina de garbanzo
- 1/2 taza de agua
- 1/2 cdta de semillas de coriandro
- 1/2 cdta de semillas de comino
- 1 pizca de sal
para los vegetales:
- 1 morron
- 1 zanahoria
- 1 cebolla
- 1 diente de ajo
- aceite de oliva
- un chorrito de vino blanco
Instrucciones
Poner la harina de garbanzo y el agua en un bol, mezclar con un batidor de varillas hasta que este homogeneo y agragar una pizca de sal. Dejar reposar. Calentar una sarten sin aceite y tostar las semillas por una par de minutos. Dejar enfriar. Moler un poco las semillas y agregar a la mezcla de garbanzo y agua. Cortar las verduras en tiritas finas y saltear en aceite de oliva por 10 minutos o hasta que empiecen a estar tiernas, agregar el vino y cocinar un par de minutos mas. Calentar otra sarten con un poquitito de aceite o spray vegetal. Mezclarla mezcla para homogeneizar la mezcla de harina de garbanzo. Y poner un cucharon de la mezcla en la sarten bien caliente, mover hasta que quede una capa pareja. Cocinar hasta que los bordes esten doradas y dar vuelta cuidadosamente y dejarlo dorarse por unos minutos. Repetir con el resto de la mezcla. Poner la mitad de las verduras en sobre cada uno de los crêpes, doblar y servir. Yo lo servi acompañado de verdolaga o portulaca comestible, es una suculenta que aparece en nuestras macetas en primavera y es super nutritiva. Buen provecho!

These crêpes are a vegan classic, i am not taking credits for it because it is a imposoble to know who invented itBut as a Classic it is worth a try. My version has some toasted seeds for some aromatic effect and a hint of wine in the veggies.
Ingredients
for the crêpes:
- 1/2 cup chickpea flour (garbanzo flour, Gram flour)
- 1/2 cup water
- 1/2 tsp coriander seeds
- 1/2 tsp cumin seeds
- 1 pinch of salt
for the veggies:
- 1 bell pepper
- 1 carrot
- 1 onion
- 1 garlic clove
- olive oil
- a shot of white wine.
Instructions
Put the chickpea flour and the water in a bowl, mix thoroughly and add the salt. Let rest. Heat a pan without any oil and toast shortly the coriander and cumin seeds. Let cool. Crush the seeds and add to the batter Dejar
reposar. Cut the carrot, onion, pepper and garlic in thin stripes. Stir fry them in olive oil for 10 minutes or until they start to be tender and add a shot of white wine. Let simmer a couple more minutes and set aside.
Heat another pan with a bit of oil or vegetable spray. Stir the batter and pour half of it on the heated pan. Move it until the there is a thin and even layer and when the edges turn golden, flip the crêpe carefully and let it turn gold on the other side. Repeat with the remaining batter. Lay half of the vegetables on each of the crêpes and fold them nicely. I chose purslane to add some colour, it is an edible succulent which grows wildly in spring. It has some nicely acid flavor and it is super nutritious. Bon apetit!!
Siempre quise probar hacer un pan tipo Pita sin gluten. Lo genial de este pan es que se hace sin horno, yo lo hice en plancha de hierro pero es posible hacerlo en sarten. Toma en total 30 minutos aproximadamente y Voilà!
Ingredientes
-1 taza de premezcla sin gluten con goma xantica (yo puse 1 cdta de polvo de hornear sin gluten, 1 cdta de goma xantica,1/3 de maicena y complete la taza con mitad de harina de arroz y mitad de harina de mandioca )
- 2 cdas de semillas de lino molidas
- 1/2 cdta de sal
- 1/2 cda de aceite neutro
- 1/2 taza de agua aproximadamente.
- extra harina
Instrucciones
Mezclar la harina, la sal, el polvo de hornear, y el lino y mezclar bien todo lo seco. Agregar el aceite y luego de muy poco el agua hasta que lograr una masa que no se pegotee y sea elastica. Prender la placnah para que se caliente, si lo hacen en sarten pueden esperar un poco para este paso. Separar la masa en 4 partes y enharinen una superficie para amasar con palote. Si van a hacerlos para rellenar dejarlos de 5/6mm de espesor y si es para untar y que quede mas crocantes 3mm.Poner sobre la plancha o la sarten sin usar materia grasa y dejar no mas de 10 minutos del primer lado y 8 minutos del segundo. Para rellenar quizas un poco menos, ir tocando un poquito y ver que este sequito pero flexible. Disfrutar como sandwich o con un rico hummus!!
Tip, si no los comes en el dia, conviene freezarlos.
I always wanted to make a gluten free Pita style bread. The fantastic thing about this bread is that you don't need an oven to do it. I used an iron pan, it work with a normal one as well. It takes only about 30 minutes and voilà!
Ingredients
-1 cup gluten free flour mix(I did 1 tsp xanthan gum, 1 tsp GF baking powder, 1/3 cup cornstarch, and half of the remaining cup manioc starch and half rice flour )
- 2 Tbsp milled flax seed
- 1/2 tsp salt
- 1/2 Tbsp neutral oil
- 1/2 cup water.
- extra flour
Instructions
Mix well all the dry ingredients, flour, salt, flax seed. Add the oil and slowly add bits of water until the dough turns elastic and non sticking. Start heating the iron pan(if using a normal pan start heating it later)
Flour a surface. Split the dough in 4 pieces and roll them with a rolling pin, 5/6 mm thick if you want to open for a sandwich or half for crispier just to spread. You can also cut them after rolling the dough in as many pieces as you like. Put them on the heated pan without any fat, 10 minutes on one side, turn and let it for 8 minutes more. Check the texture by touching softly the top part. Enjoy them with hummus or as a sandwich!!
Tip if you don't eat them the same day, it is better to put the remaining ones in the freezer.
Hace unos dias que busco una excusa para estrenar unos moldes muy bonitos que me regalo una amiga. Tenia unas bananas muuuy maduras (casi negras) y la idea de hacer algo con semillas de amapola. El resultado del experimento fue muy rico en el primer intento! Aqui la receta,
Ingredientes
- 2 bananas muuy maduras
- 1 pocillo de aceite neutro
- 2 cdas de semillas de lino molido
- 2 cdas de agua
- 2 cdas de cascara de naranja seca molida o una tirita fresca cortado bien chiquita
- 3/4 taza de azucar
- 3/4 taza de harina de arroz
- 3/4 taza de almidon de maiz
- 2 cdtas de polvo leudante (sin gluten)
- 1 cdta de bicarbonato de sodio
- 2 cdas de semillas de amapola
Instrucciones
Pisar bien las bananas. Agregar el aceite, el azucar y la cascara de naranja y mezclar hasta que quede como una crema. Mezclar el lino molido con las 2 cdas de agua y dejar reposar. Precalentar el horno a 180 y engrasar(manteca, aceite de coco o aceite neutro) los moldes. Agregar el lino hidratado a la mezcla de banana. En otro bol poner el almidon de maiz. harina de arroz, polvo leudante, bicarbonato de sodio y semillas de amapola y mezclar bien hasta ver que las semillas de amapola estan repartidas por toda la mezcla. Unir las partes secas y humedas y mezclar bien. Llenar 3/4 de los moldes y hornear 15 minutos hasta que esten suavemente dorados y al pinchar con un palillo salga limpio. Mmmmm delicioso!! ACTUALIZACION: Si no los comen en el dia lo mejor es freezarlos y descongelar para comer, ya que por la humedad que tienen, cambian un poquito la textura a medida que pasa el tiempo.

I have been looking for an excuse to use for the first time a very pretty I got as a present. I had 2 super ripe bananas and had the idea of baking something with poppy seeds. The result of the experiment was very good at the first try! So here is the recipe.
Ingredients
- 2 very very ripe bananas
- 1 espresso cup neutral oil
- 2 Tbsp flax seed, milled
- 2 Tbsp water
- 2 Tbs orange zest, milled if dry, or chopped if fresh.
- 3/4 cup sugar
- 3/4 cup rice flour
- 3/4 cup cornstarch
- 2 tsp baking powder
- 1 tsp baking soda
- 2 Tbsp poppy seeds
Instructions
Mash the bananas. Add oil, sugar and orange zest and cream together. Mix the milled flaxseed with the water and let rest. Preheat the oven into 180º and grease the baking cups. Add the flax seed water to the banana bowl and mix well. In another bowl put the rice flour, corn starch, baking powder, baking soda, and poppy seed, Stir them until the poppy seeds are evenly distributed. Combine wet and dry and whisk together until it is even. Fill 3/4 of the cups and bake for 15 minutes or until golden and a toothpick comes out clean. UPDATE, If you don't eat them in the same day, it's best put them in the freezer and take them out to eat. Mmmm delicious!!
Estas galletitas las prepare para enfrentar un viaje de 30 horas en 3 aviones. Y me salvaron la vida porque la aerolinea extravio mi pedido de comida sin gluten. Son un snack muy sabroso y nutritivo. El mani, a pesar de gozar de mala fama tiene muchas proteinas y fibra, minerales como el zinc, potasio y manganeso y un monton de vitaminas entre ellas la B3, tambien conocida como niacina. Asi que dicho esto, aqui la receta.
Ingredientes
- 1 1/2 taza de mani tostado
- 1 taza de harina de maiz.
- 3 cdas de vinagre de arroz
- 1 chorrito de salsa de soja sin gluten
- 1/2 vaso de agua
Instrucciones
Poner en la procesadora el mani (si el vaso es chico hacerlo en partes) e ir pulsando con paciencia primero hasta que se forme como una harina y luego una crema. Despues de cada pulsacion despegar lo que se va pegando a los bordes. Si es necesario agregar 1 o 2 cucharadas de aceite de mani o neutro tipo girasol. Una vez lograda la crema o manteca de mani deberia ser masomenos una taza en total. Precalentar el horno a 180º y forran una placa con papel de horno o una plancha de silicona para horno. Si tienen lugar en el vaso de la procesadora ir agregando los ingredientes pulsando hasta obtener una mezcla pareja. Si no volcar en un bol, e ir agregando los ingredientes y mezclando cuidadosamente para que todos los ingredientes se integren bien y quede una pasta cremosa. Esparcir sobre la placa una capa pareja de 3mm de espesor. Para estirar bien se puedo poner un film y amasar por arriba. Cortar en rectangulos o la forma que gusten. Hornear 15 minutos, dar vuelta y hornear otros 15 minutos del otro lado. Buen provecho!!
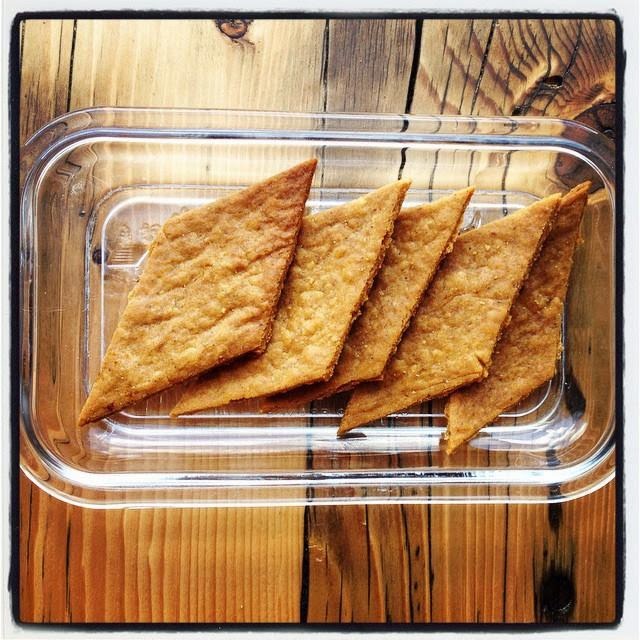
I baked these crackers to face a 30 hours trips taking 3 flights. And they saved my life because the airline forgot my special Gluten Free food request. They are a delicious and very nutritive snack. Peanuts may have a bad reputations but actually they have lots of protein, fiber, minerals such as zinc, potassium and manganese and a load of vitamins. So I rest my case and below the recipe.
Ingredients
- 1 cup unsalted and unsweetened peanut butter OR 1 1/2 cup toasted peanuts to make the butter
- 1 cup cornflour.
- 3 Tbsp rice vinegar
- 1 shot Gluten Free soy sauce
- 1/2 glass water
Instructions
If you have ready made peanut butter just jump to the next paragraph. To make your homemade peanut butter, put the peanuts in a food processor. If the container is not big enough to comfortably process all the peanuts, do it in parts. Pulse the processor until it turns into a rough sand, scrap the walls and pulse again scraping from time to time the walls until you get the cream, if necessary you can add 1 or 2 Tbs peanut oil or some neutral oil.
Preheat the oven into 180ºC and line a baking sheet with parchment. Then add all the other ingredients in the processor container or if it is small put each ingredient in a bowl and mix thoroughly until it turns into a creamy paste. Spread the paste on the parchment, if necessary cover with another piece of parchment and roll until it is around 3mm thick. Cut in rectangles or the shape you like. Bake 15 minutes on one side, turn and bake 15 minutes on the other side. Enjoy!!
Un par de semanas atras mi sobrino no queria comer carne. El no habia probado nunca las lentejas y yo pense que podia ser una forma divertida y rica de comer proteinas y hierro. Asi que prepare estas hambrguesitas para el. Y fueron un éxito. Aqui la receta.
Ingredientes
- 1 taza de lentejas crudas cocidas en 2 1/2 veces su volumen en agua con un poquito de sal
- 2 zanahorias chicas o 1 grande
- 1 cebolla mediana
- 2 cdas de semillas de lino molidas
- 3 cdas rasas de harina de garbanzo
- polenta para rebozar
Instrucciones
Cocinar las lentejas hasta que absorban toda el agua, si todavia estan duras agregar un poco mas de agua hasta que esten tiernitas. Dejar enfriar aparte. Picar en la procesadora las semillas de linoy poner en un bol, seguir con las zanahorias y las cebollas y agregar en el bol. Si la cebolla les resulta fuerte pueden darle un golpe de microondas antes de sumar a la mezcla. Agregar la harina de garbanzo tamizada y mezclar bien hasta obtener una mezcla pareja. Pasar las lentejas tambien por la picadora o preocesadora y sumar al bol. Mezclar bien. Poner en un plato una capa de polenta. Tomar porciones de la mezcla y hacer una bolita con la mano, aplastar y emparejar los bordes. Pasar generosamente por polenta de los 2 lados. Para cocinar se pueden hacer al horno, a la plancha o a la sarten 5 minutos de cada lado como las hice yo. Salen 12 chicas u 8 medianas, se pueden freezar con separador y ya te quedan listas !!
Yo recomiendo acompañar con ensaladita de tomate o comer algun citrico de postre ya que la vitamina C fija el hierro vegetal.
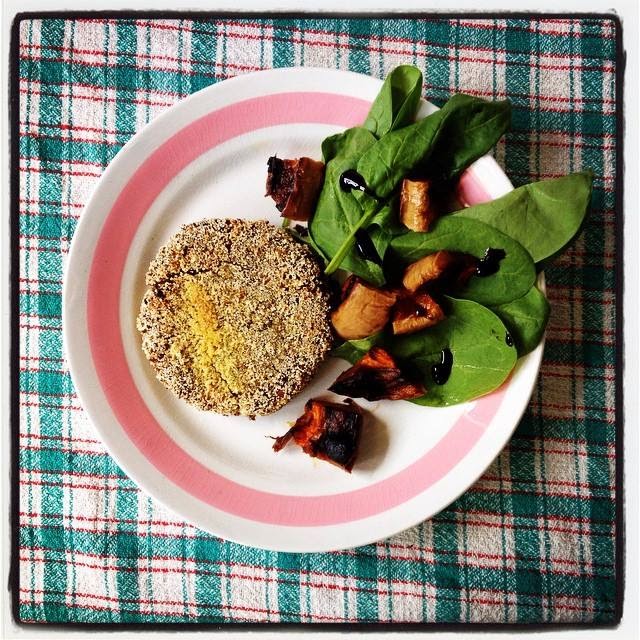
A couple of weeks age, my nephew refused to eat meat. He had never tried lentils and I thought it could be a nice and delicious way of eating protein and iron. So I prepared this little burgers for him and they were a success. Below the recipe.
Ingredients
- 1 cup raw lentils cooked in 2 1/2 times water with a pinch of salt
- 2 small carrots or 1 big one
- 1 medium onion
- 2 Tbsp flax seed milled
- 3 Tbsp chickpea flour
- polenta or cornmeal to cover
Instructions
Cook the lentils until they absorb all the water if they are not tender, add a bit more water and cook a bit more.
Set aside to cool. Put in a food processor the flax, and put in a bowl. Then process the carrots and the onion very small but not a paste. Add the chickpea flour and mix thoroughly. Process also the lentils and add to the bowl. Mix again until smooth. Place a layer of polenta in a dish. Roll portions in the hand and flatten rounding the edges, cover generously each burger with polenta. They can go in the oven or slightly fried 5 minutes each side as I did. It makes 12 small or 8 medium, you can freeze them and have them whenever you want. A tip, eat them with tomato salad or come citric as a dessert because C-vitamin fixes the iron the comes in the veggies.
Ingredientes
- 100gr de harina de maiz
- 1 taza de amaranto inflado *
- 100gr de coco rallado
- 60 gramos de manteca o margarina si quieren hacerlo vegano
- jugo de 1 lima
- 2 cdtas de polvo de hornear
- 2 cdtas de extracto de vainilla a gusto
- 4 cdas generosas de pure de manzana
- 50 gr de azucar (asi son suavemente dulces, pero a gusto pueden usar mas)
Instrucciones
Precalentar el horno a 180º y forrar una bandeja con papel de horno o enmantecar y enharinar. Mezclar bien todos los ingredientes secos en un bol y los ingredientes humedos en otro hasta obtener una mezcla homogenea. Luego combinar las 2 partes y mezclar bien. Poner porciones con una cucharita aplastando un poquito arriba. Hornear por 10-15 minutos o hasta que esten doraditos. Dejar enfriar bien y guardar en recipiente hermetico. A disfrutar!
* para hacer el amaranto inflado se pone el amaranto en una sarten con tapa cubriendo apenas la superficie del fondo sin usar nada de aceite o materia grasa. Se calienta la sarten y en muy poco tiempo se explotan los granitos, es muy rapido asi que hay que estar atento a que no se queme.
Ingredients
- 100gr corn flour
- 1 popped amaranth *
- 100gr shredded coconut
- 60 gr butter or margarine
- juice of 1 lime
- 2 tsp lime juice
- 2 tsp vanilla extract
- 4 generous Tbsp apple sauce
- 50 gr de sugar (they are softly sweet, to taste feel free to use more)
Instructions
Preheat oven to 180ºC and line a baking tin with parchment. Mix all the dry ingredients in one bowl and all the wet ingredients in another one. Then combine both parts and mix thoroughly. Lay portions with a teaspoon and flatten a bit the top. Bake for 10/15 minutes or until golden. Let cool completely and store in an air tight container. Enjoy!
* to pop the amaranth put a very thin layer of amaranth in a pan without any oil or fat. Heat until it pops, it goes very fast so be careful not to burn them.
.
Me encanta desayunar con cereales, cuando me diagnosticaron la celiaquia fue una de las cosas que mas extrañe. Lamentablemente en Argentina recien estan apareciendo opciones. Yo prepare esta con ingredientes traidos de Alemania y Polonia. Pero quizas en otros paises de habla hispana se pueden conseguir. Si no consiguen avena sin gluten puede reemplazar por algun otro copo y cereal sin gluten.
Ingredientes
- 4 tazas de avena sin gluten
- 1/3 de taza de chia molida
- 1/3 taza de semillas de lino molidas
- 1/3 taza de amaranto inflado*
- 1/2 taza de nueces picadas gruesamente
- 1 cdta de canela
- 3 cdas de aceite de coco
- 3 cdas de miel
- 1/2 taza de agua
- 1 puñado de semillas de girasol
- 1 taza de cranberries o pasas de uvas o las frutas desecadas que gusten
*Si no consiguen el amaranto inflado, es muy facil de hacerlo: Calentar por un minuto una sarten limpia al fuego sin ningun aceite o grasa. Agregar una capa muy finita de semillas de amaranto y tapar. La cantidad de amaranto no tiene que cubrir totalmente la base de la sarten. Van a explotar inmediatamente y en menos de un minuto tiene que estar listo, retirar del fuego y poner en un bol para que no se quemen con el calor remanente de la sarten.
Instrucciones
Mezclar la avena, la chia, el lino, la canela, las nueces y las semillas de girasol en un bol grande y mezclar bien. En otro bol mezclar el aceite, la miel, y el agua. Si la miel y el aceite estan solidos derretir a baño maria o con el microondas. Mezclar hasta emulsionar, que quede una mezcla homogenea. Prender el horno bajito, alrededor de los 100ºC. Unir lo seco y lo solido y mezclar energicamente. Forrar 2 placas de horno con papel de hornear, en este caso es mas un tema de limpieza si no consiguen esten mas atentos porque se puede quemar facil o pongan el horno un poco mas bajito. Meter al horno por 10/15 estando atentos que no se queme, retirar, agregar las cranberries o la fruta de eleccion, mezclar cuidadosamente hasta que quede homogeneo. Volver a hornear otros 10/15 alternando la posicion de las placas en el horno. Retirar mezclar de nuevo y dejar enfriar. Guardar en recipiente hermetico y a disfrutar tus proximos desayunos!
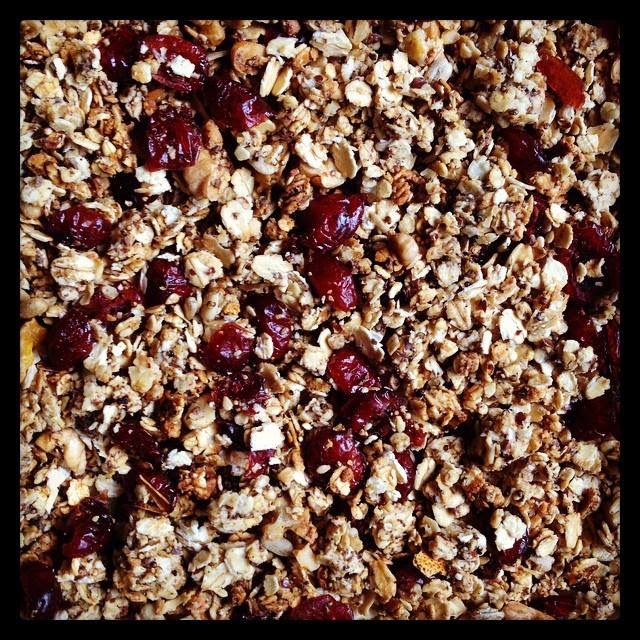
I love to have cereals for breakfast, when I was diagnosed with the Celiac Disease, that was one of the things I missed the most. Luckily the options for a gluten free cereal breakfast are growing. I prepared this granola in Argentina with ingredients brought from Germany and Poland. If you don't find gluten free oats, you can replace it with some other gluten free cereal.
Ingredients
- 4 cups gluten free oats
- 1/3 cup milled chiaseeds
- 1/3 cup milled flaxseed
- 1/3 popped amaranth*
- 1/2 cup chopped walnuts
- 1 tsp cinnamon
- 3 Tbsp coconut oil
- 3 Tbsp honey
- 1/2 cup water
- 1 handful sunflower seeds
- 1 cup cranberries
*If you don't find already popped amaranth is very easy to prepare at home. Heat for a minute a clean pan without any fat or oil. Add a very very thin layer of amaranth and cover with a lid. They are going to pop immediately. When they are ready it should be less than a minute, take them out of the pan and lay in a bowl to avoid burning with the remaining heat of the pan.
Instructions
Mix oats, chia seeds, flax seeds, cinnamon, walnuts, and sunflower seeds in a big bowl and mix thoroughly
In another bowl mix honey, coconut oil, and water, until it becomes even. If the honey and the oil are solid melt them a bit with the microwave. Preheat the oven low into 80/100ºC. Mix dry and wet thoroughly. Line 2 baking trays with parchment and spread the mix. Bake for 10/15 minutes taking care that it does not burn. Take the trays out and add the cranberries mixing them evenly and bake for other 10 until softly golden. Take out and mix once more, let cool completely and store in an air tight container and enjoy your next breakfasts


